Prebaked Pie Shell
Submitted by DamLuli
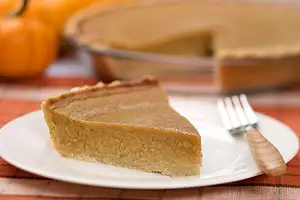
Prebaked pie shell using a classic lard-and-butter pastry. Blind-baked with weights for a flaky, sturdy crust ready to hold cream pies, fruit fillings, or quiche.
YIELD
16 servingsPREP
35 minCOOK
25 minREADY
60 minA great pie starts with a great crust, and this prebaked shell is the workhorse pastry every cook should know. The dual-fat approach is what makes it special. Lard brings the flake, butter brings the flavor, and using both delivers a crust that breaks into shatter-crisp shards while still tasting buttery. Modern all-butter crusts get the flavor right but can turn dense; all-shortening crusts flake beautifully but taste flat.
The technique is old-school but worth respecting. Cut the fat into the flour only until the pieces are grape-sized. Visible chunks of fat are not a mistake, they are the entire point. Those chunks melt during baking and leave behind tiny pockets that puff into layers of flake. Over-mixing eliminates the chunks and you end up with a dense, cookie-like crust.
Blind-baking with foil and weights (rice, dried beans, or ceramic weights) is what stops the crust from puffing up or slumping down the sides. Fifteen minutes weighted, then five to ten minutes uncovered to brown the bottom, gets you a fully baked shell ready to hold any cold or wet filling.
Pro Tips
- Keep everything cold. Iced water, cold fats, and chilled flour produce the flakiest result. Warm fats melt into the flour and you lose all the flake.
- Rest the dough for at least an hour before rolling. Resting relaxes gluten and prevents shrinkage during baking.
- Use parchment paper instead of foil for blind baking if you have it. Parchment releases more cleanly than foil.
- Save the blind-bake weights in a labeled jar. Rice and beans can be reused indefinitely for this purpose.
Variations
- For a dessert pie, add 2 tablespoons of sugar to the flour for a slightly sweet crust.
- Substitute all butter for the lard if you prefer (use 12 tablespoons total). Texture will be slightly less flaky but flavor is richer.
- Add a teaspoon of vinegar to the iced water for an even more tender crust. The acid weakens gluten formation.
Ingredients
Directions
In a large bowl, combine the flour with the lard, butter, and salt.
Mix lightly with your fingertips until the dough forms grapesized pieces.
You should still be able to see chunks of fat.
Stir in the iced water.
Lightly knead, handling the dough as little as possible, until the dough forms a ball.
Add a little more iced water if necessary. Transfer to a plastic bag and shape into a log.
Cut into 2 pieces and place each inside an airtight bag.
Seal the bags, pressing out any air, and chill for 1 hour or as long as 3 days.
The pie dough can be frozen for as long as a week.
Roll out half of the dough to a 12 inch round about ⅛ inch thick and use it to line a buttered and floured 10 inch pie pan, pressing the dough well into the bottom and up the sides without stretching.
Chill for 30 minutes. Preheat the oven to 350℉ (180℃).
Cut out a circle of aluminum foil or parchment paper and fit it into the chilled pie shell.
Fill with rice, beans, or ceramic pie weights and bake the pie shell for about 15 minutes, or until the edges are just golden and beginning to pull away from the sides of the pan.
Remove the paper and the weights and return the shell to the oven to finish cooking for 5 to 10 minutes more.
Cool on a rack.
Comments